Samsung Galaxy Tab A FRP Bypass Without PC Android 9
This is a step-by-step guide on how to bypass FRP on the Samsung Galaxy Tab A running the latest Android 9 version. You would probably have come across a number of methods to bypass a Google account and that may or may not have worked for you.
It is because Android security patch updates are fixing the loopholes that were previously used to bypass FRP on Samsung Galaxy Note 10 Plus running the previous Android version. The bypass method even shared here may or may not work in the future because it might be fixed in the next Android update for your Samsung Galaxy Tab A.
This is a 100% working guide if your Samsung Galaxy Note 10+ is running Android 12. We have personally tested this bypass method and it is confirmed to work.
The Samsung Galaxy Tab A 8.0 SM-T290 and SM-T295 (LTE) was a best-selling Tablet from Samsung that was released on July, 2019, with Android 9. It sports a single 8MP camera setup and includes 3GB of RAM with an Qualcomm SDM429 Snapdragon 429 (12 nm) processor.
If, for any reason, you cannot successfully bypass the Google account because it is too complicated for you, then try our remote FRP bypass service to get your phone unlocked within 5–10 mins. If you’ve got any questions before using the service, live chat support is given on the page.
This is a 100% working guide if your Tab A SM-T290 and SM-T295 is running Android 9 We have personally tested this bypass method and it is confirmed to work.
Samsung Galaxy Tab A 8.0 FRP Bypass without PC 2023
If your Galaxy Tab A is FRP locked after a hard reset, it will ask for a Google account with a similar screen as given above with the following message.
In this case, if you remember the Google account, pattern, or pin lock, then you can easily bypass it. Otherwise, follow the guide below to unlock your phone.
Now back to the real method that has a 90% chance of getting your phone unlocked. Follow the step-by-step instructions to bypass the FRP lock.
Without further wasting your time, let’s move on to the process of removing your Google account from your phone. In this method we are going to use pc.
-
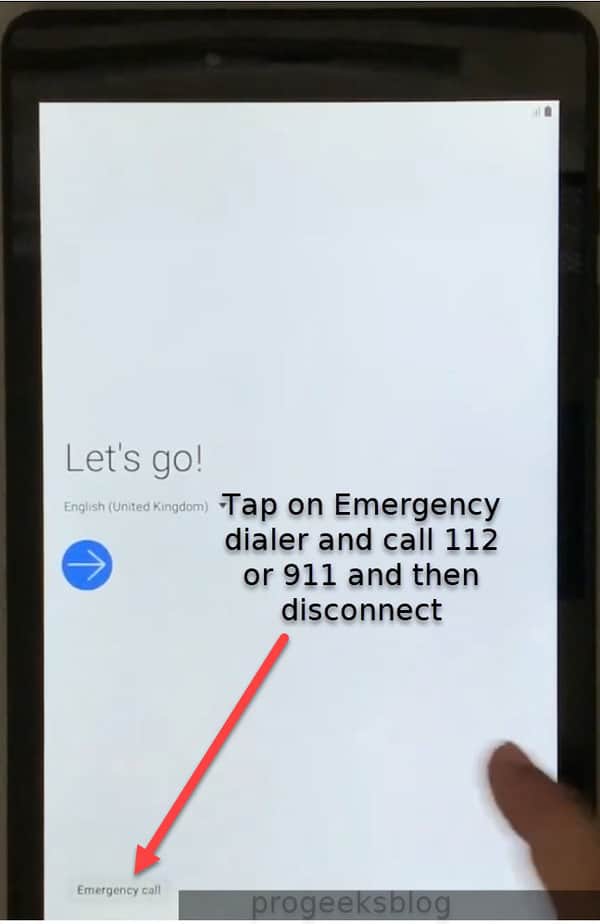
- On the Setup wizard screen, tap on emergency call dialer and call 112 or 911 and disconnect after a few seconds. Try at least 2 times.

- Now go the setup wizard and connect to WiFi and it will enventually lead you to verify your account screen.
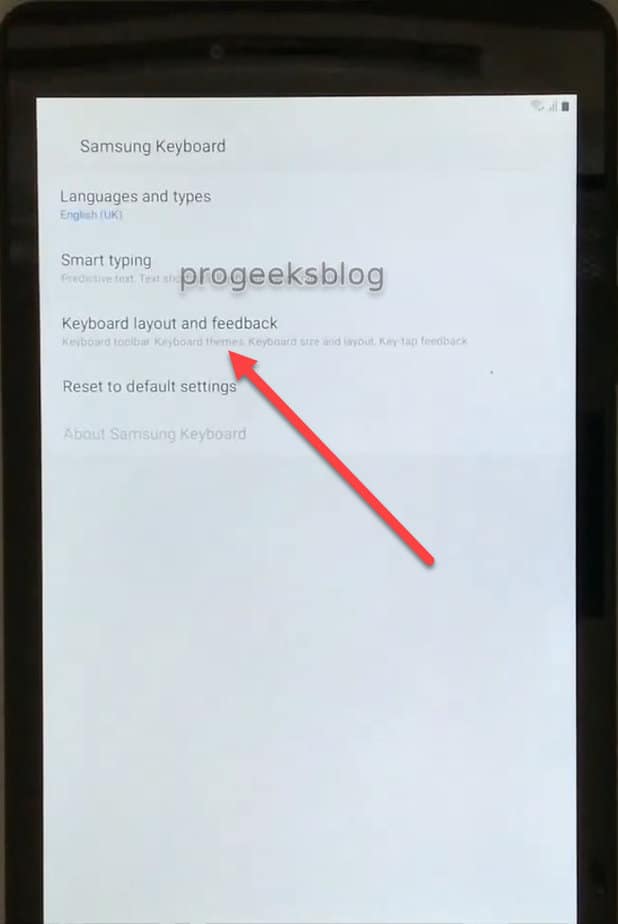
- Tap in the text area, where it asks for email account address and it will open the Keyboard app, tap on Settings icon as shown in the screenshot below:

- Next tap on Keyboard layout and feedback > Key-tap feedback > Sounds and vibration.

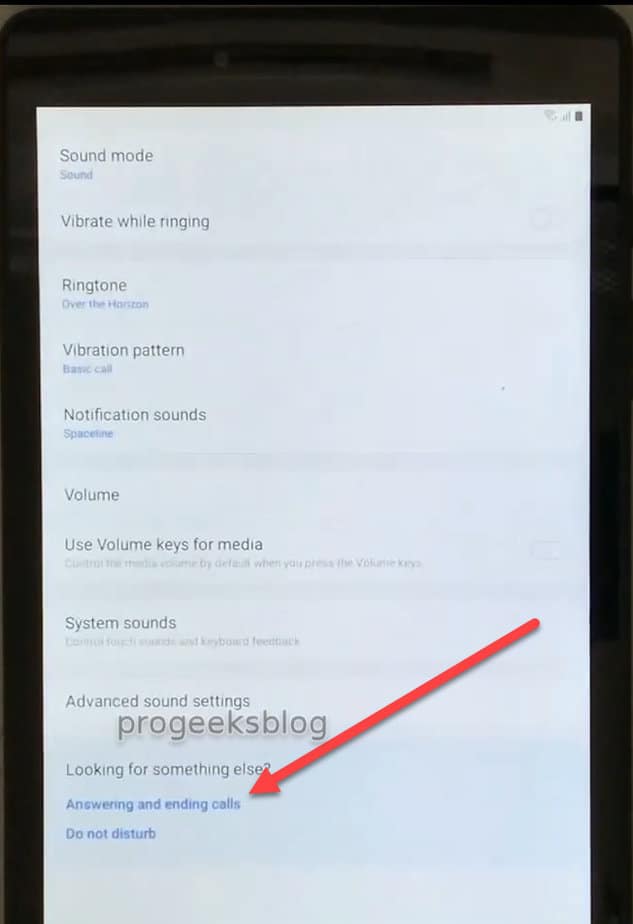
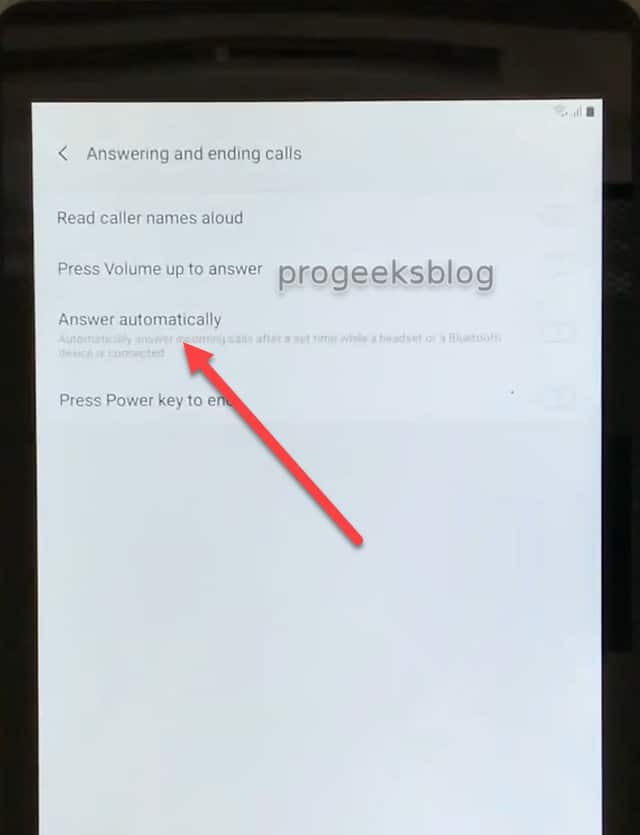
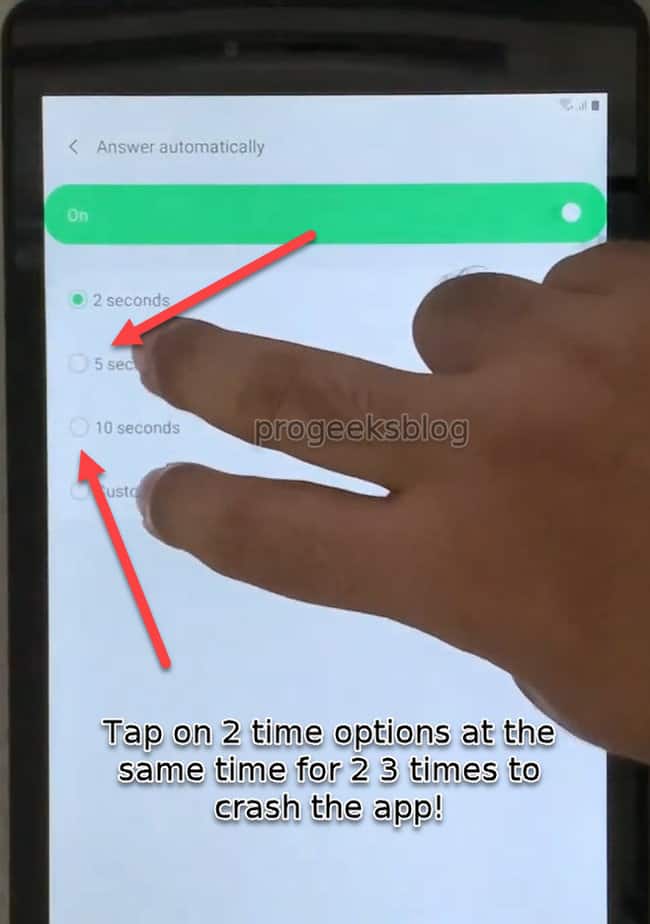
- In sounds and vibration tap on Answering and ending calls and turn on Answer automatically.


- After enabling the Answer automatically option, when need to crash this app by tapping the 2 options, for example tap 5 seconds and customize options simulatanously 2-3 times as given in the screenshot below:

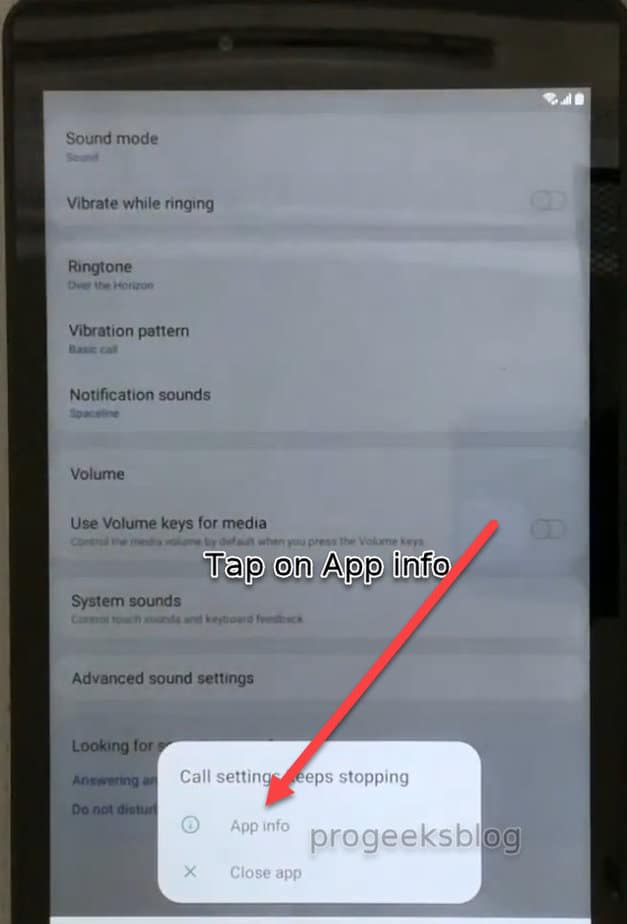
- You should get the following message after the app is crashed, tap on App info to get into app settings.

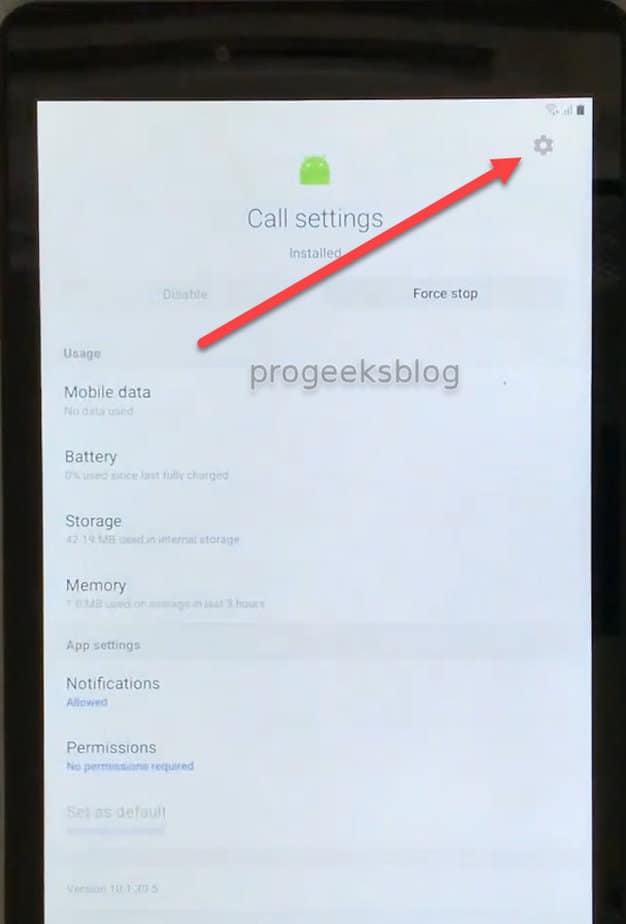
- Next tap on the Settings icon which is at the top-right corner.

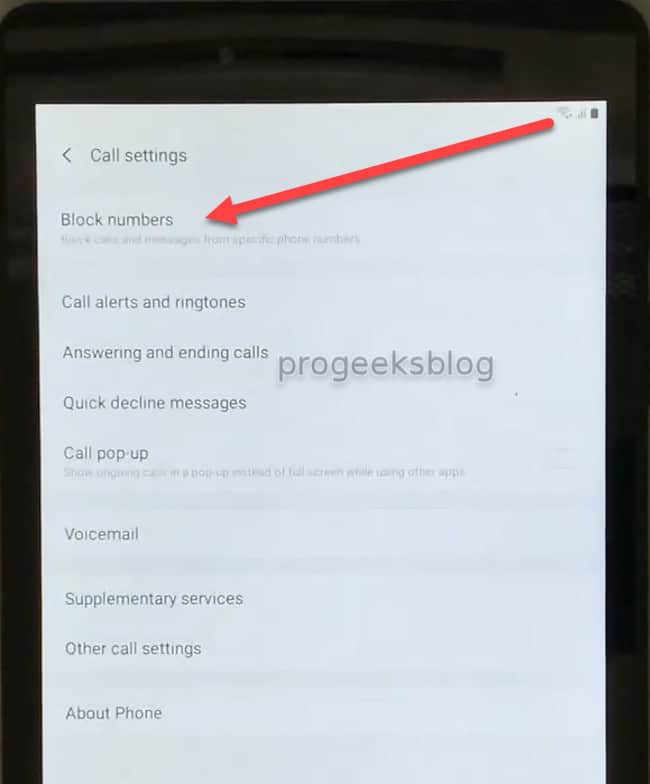
- On the next screen, tap on Block numbers > Recents > and select Emergency Number 112.

- Tap on the dialled emergency number to select it then tap on Emergency number as the arrow is pointing to below.

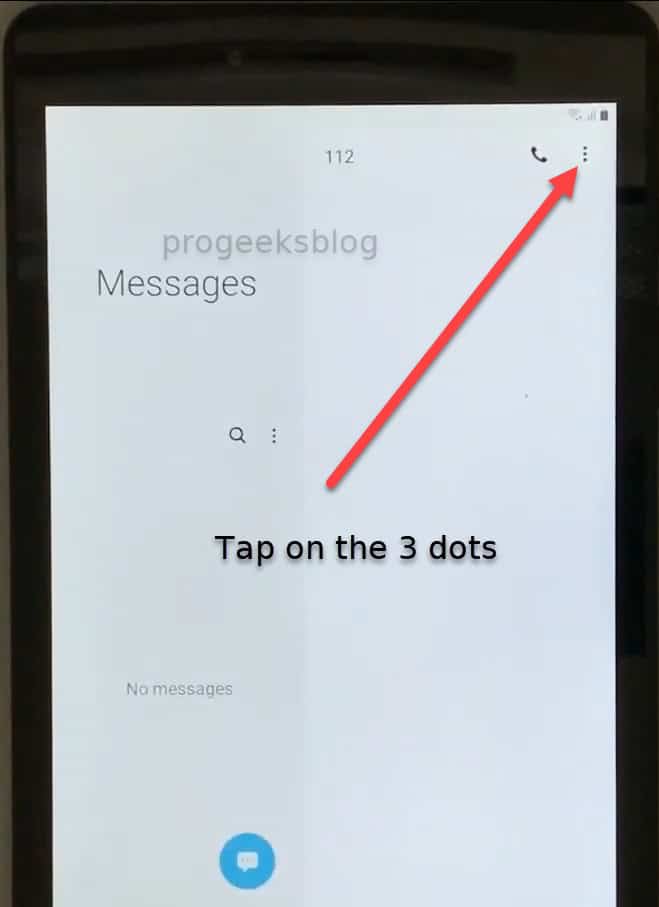
- Tap on the Message icon

- Tap on the 3 vertical dots and select Add or remove people option.

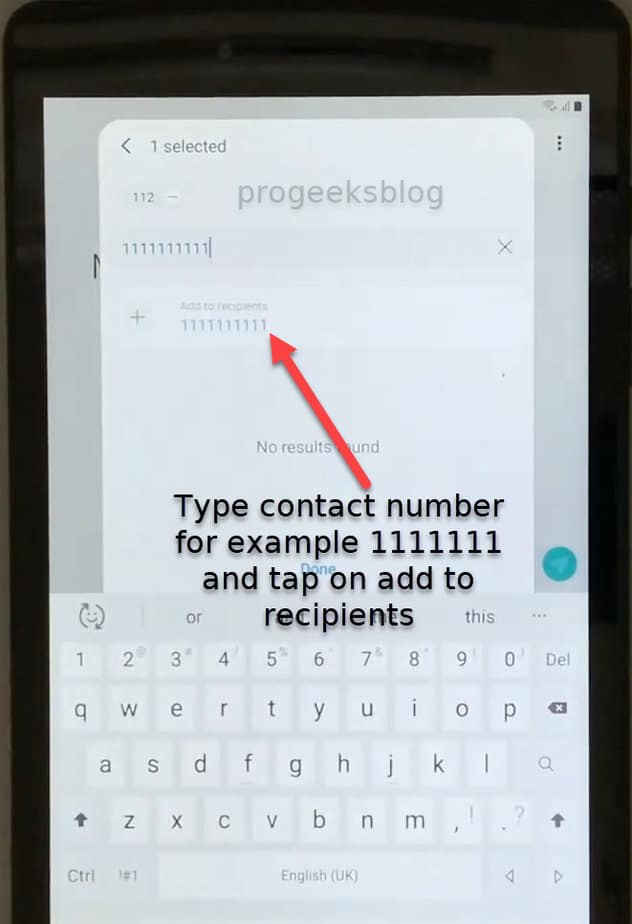
- Enter the recipient number, for example 111111111 and then tap on Add to recipients.

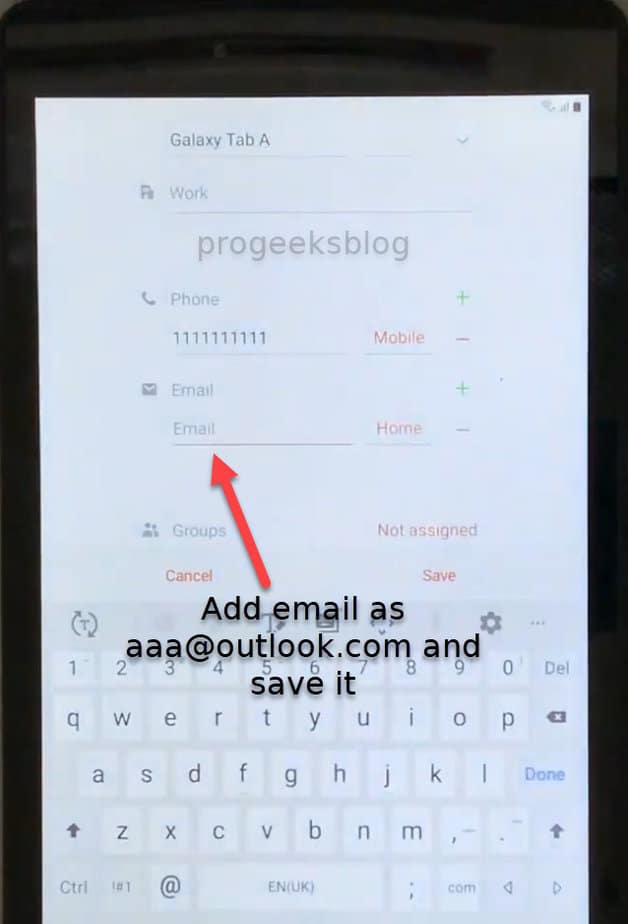
- Tap on Add Create contact and enter email address, for example [email protected] and save it.


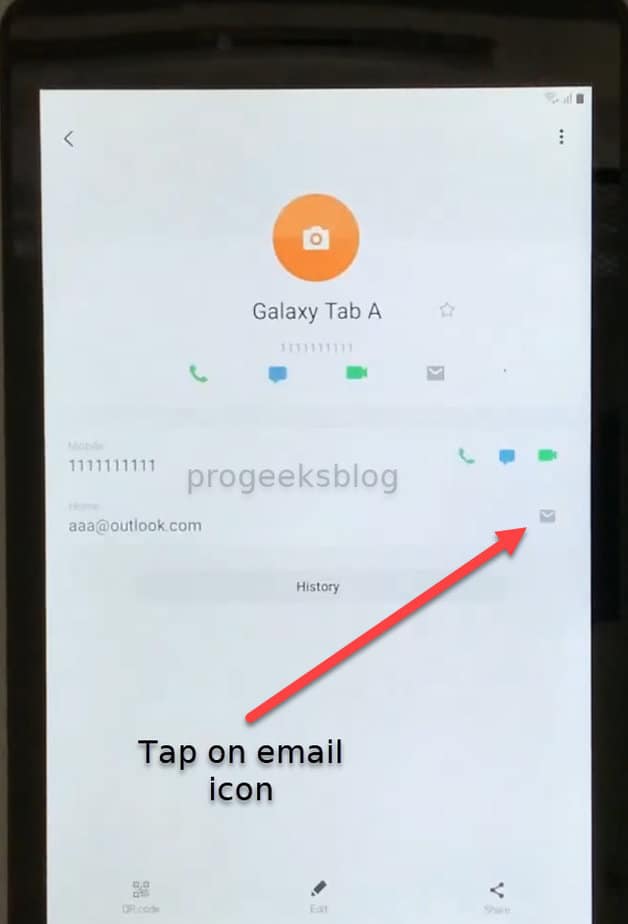
- After adding the contact recipient successfully, now tap on email icon.
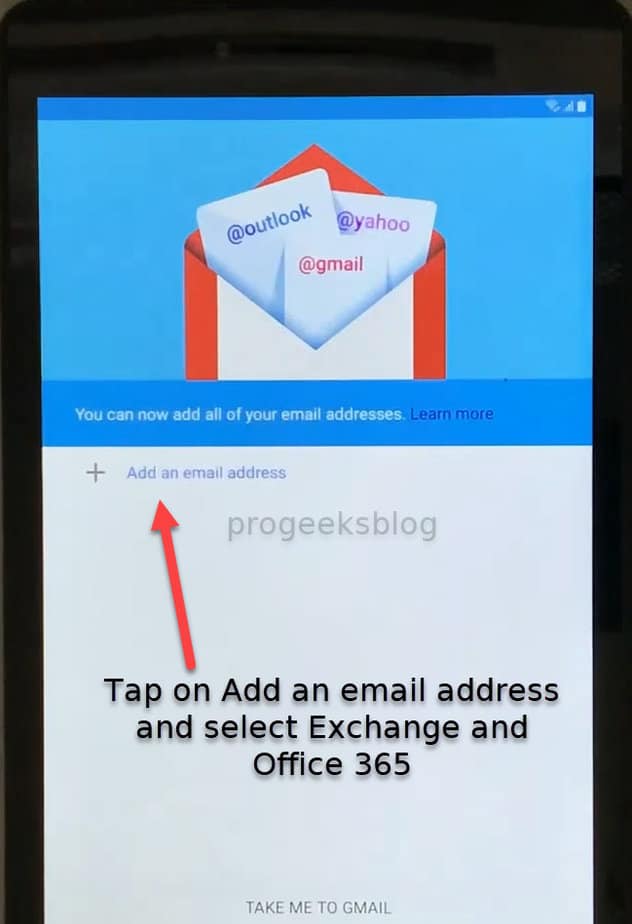
- Tap on Add email address and select Exchange Office 365.
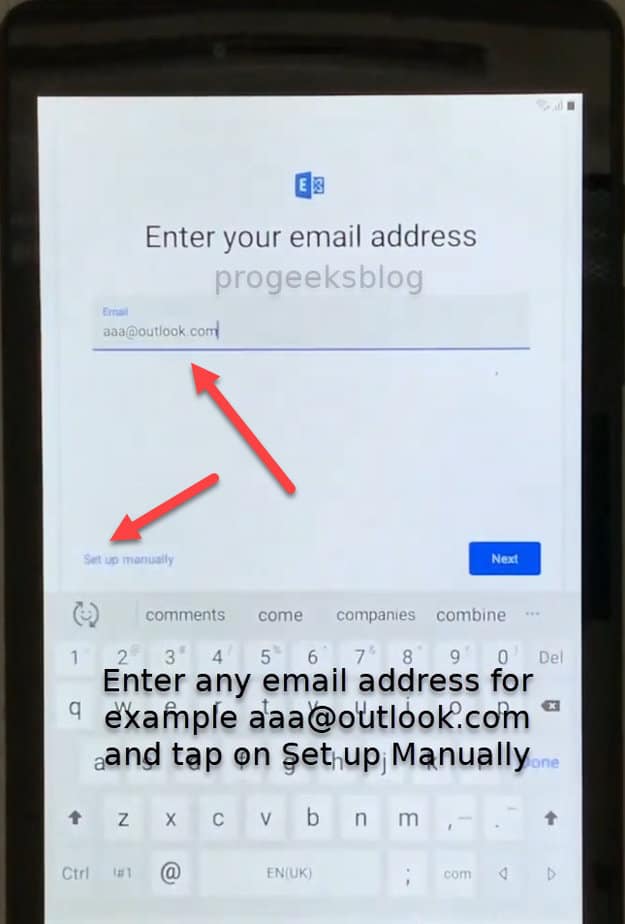
- Enter an email address, for example [email protected] and select Set up manually button at the bottom-right corner.

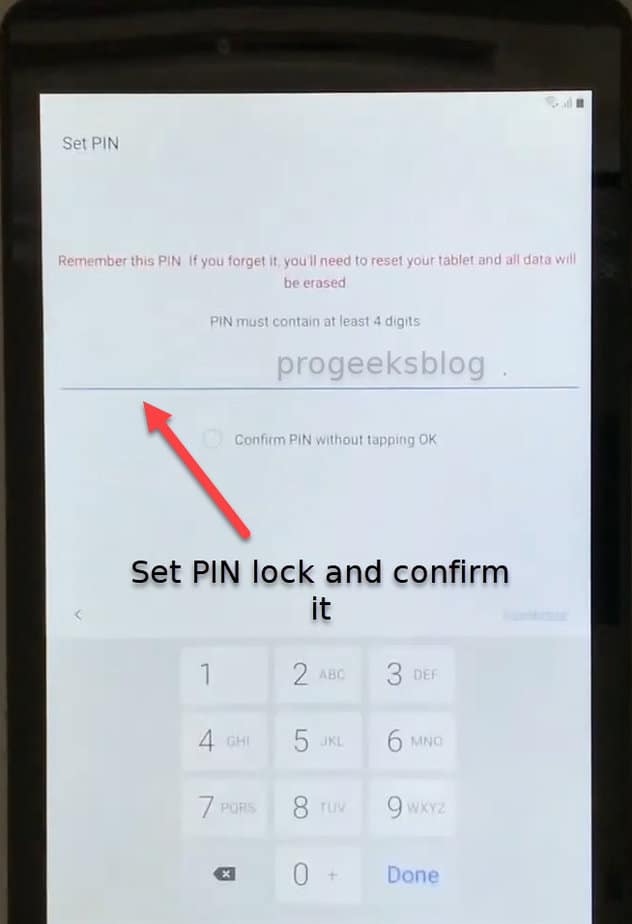
- Select certificate and it will prompt you to set a screen lock type.

- Choose PIN and enter the PIN lock and confirm it.
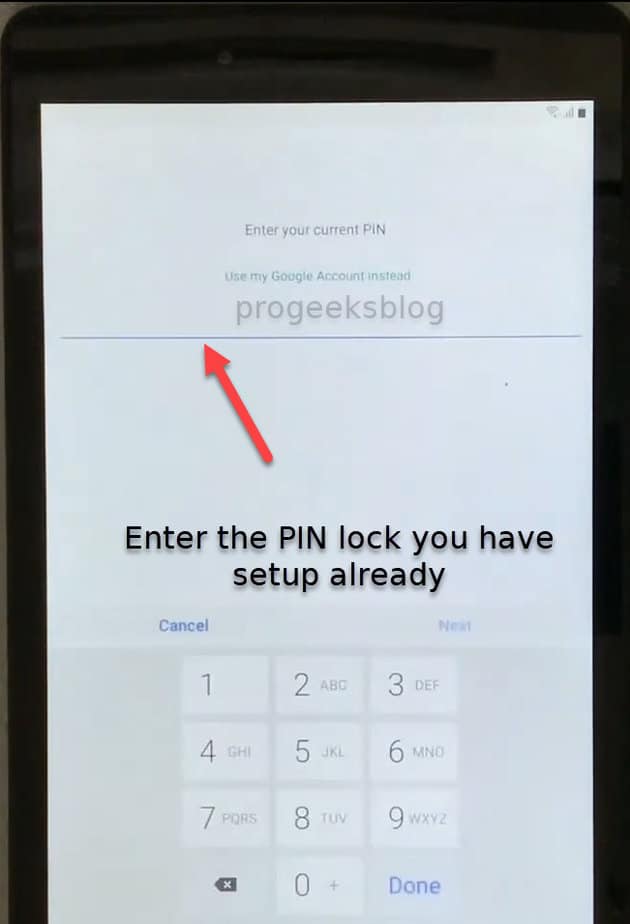
- Finally, we are almost done bypassing the FRP lock on the Galaxy Tab A. After adding the PIN, go back to Setup screen and resume the setup. This time it will give you options to use PIN or Google account to setup the tablet. Choose PIN and enter the PIN lock you have setup earlier.

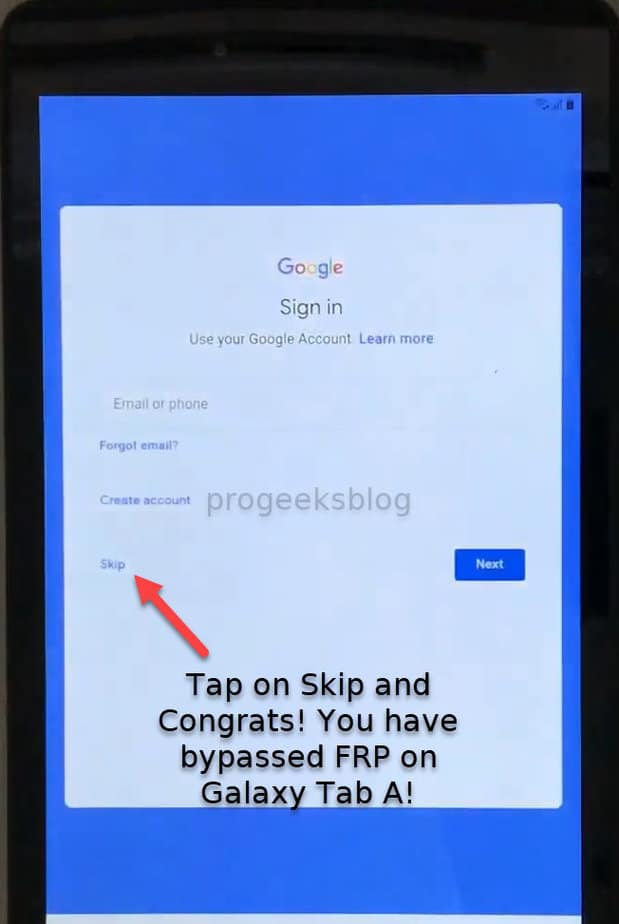
- Enter the PIN and you’ll get to the add Google account screen, you’ll also see a Skip button so tap on it.

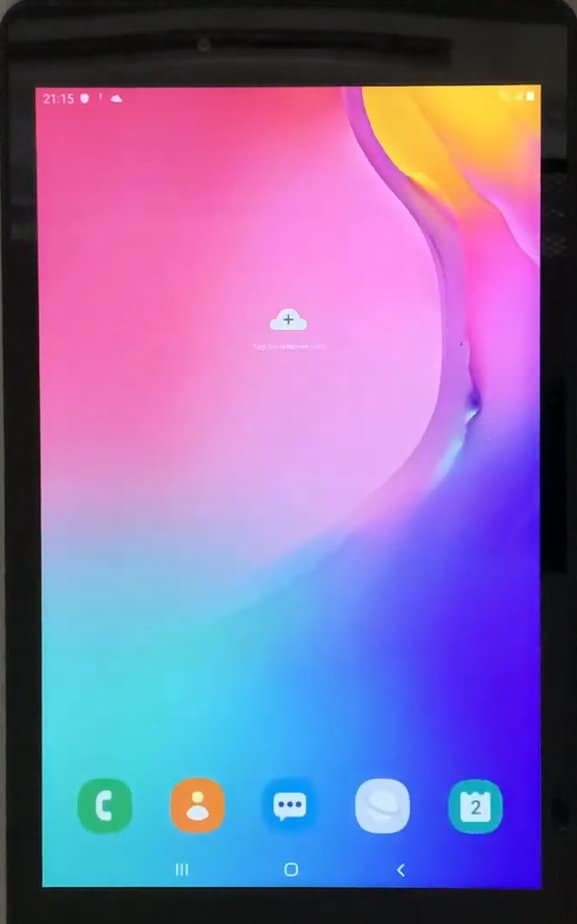
- Congratulations! You have successfully bypassed the Google account lock on your Samsung Galaxy Tab A. Do not forget to let me know in the comment section if you’ve got any issues.

Related Guides:
- On the Setup wizard screen, tap on emergency call dialer and call 112 or 911 and disconnect after a few seconds. Try at least 2 times.
- Samsung Galaxy S21 FRP Bypass bypass without PC
- Download Samsung FRP Bypass APK
- Samsung Galaxy A12 FRP Bypass without PC