Step-by-Step Guide: How to root Pixel 7a with Magisk
Rooting your Google Pixel 7a with Magisk allows you to gain privileged access and control over your device’s operating system. This step-by-step guide will walk you through the process of rooting your Pixel 7a using Magisk. By rooting your phone, you can customize your device, install custom ROMs, remove bloatware, and unlock additional features. However, it’s important to note that rooting your device will void the warranty and may involve certain risks. Proceed with caution and follow the instructions carefully.
Rooting Google Pixel 7a
Follow the step-by-step instructions to safely and successfully root your 7a.
Also read: Step-By-Step Guide to Factory Reset and Hard Reset Your Google Pixel 7a
Unlock the Bootloader
First of all you need to unlock the bootloader. We have already written a step-by-step to unlock bootloader on a Pixel device. Unlocking the bootloader is necessary to proceed with the rooting process.
Download and Install Fastboot ADB Drivers
First of all, it is essential to intall and setup the Google Platform tools also known as ADB and Fastboot drivers, I have written a detailed guide on How to Setup ADB and Fastboot Drivers on Windows. These drivers are essential for establishing a connection between your computer and the Pixel 7a in fastboot mode.
Enable USB Debugging
For your phone to communicate with PC, you also need to enable USB debugging from Developer options.
- On your Pixel 7a, go to “Settings” > “System” > “Developer options.” If you don’t see Developer options, go to “Settings” > “About phone” > tap on “Build number” seven times to enable it.
- Within Developer options, enable “USB Debugging” to allow communication between your device and the computer.
Download Factory Image
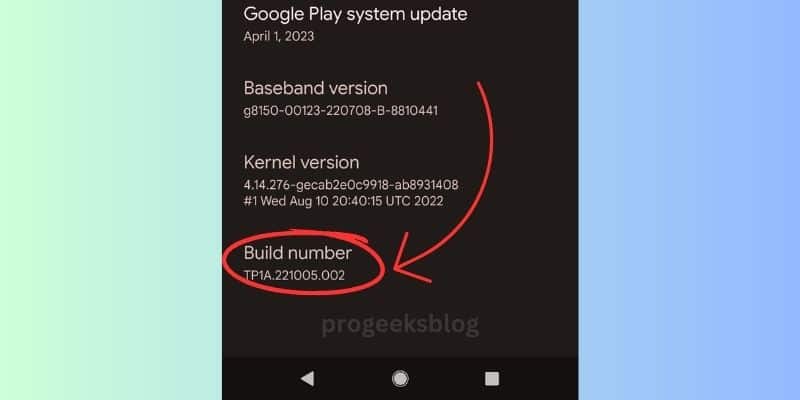
Visit the official Google Developers website and download the factory image specific to your Pixel 7a model. Select the version already installed on your device. You can confirm this from going to Settings > About phone > tap on Android version and look for the Build number.
Unzip and Copy init_boot.img to phone storage
- Unzip the factory image you downloaded.
- Locate the “init_boot.img” file within the extracted files.
- Connect your Pixel 7a to the computer via USB.
- Copy the “init_boot.img” file to the internal storage of your Pixel 7a.
Download Magisk APK
You also need to download the latest version of Magisk apk. Go to the official Magisk GitHub repository and download the latest Magisk APK file.
Install Magisk APK on Your Phone:
- Transfer the downloaded Magisk APK to your Pixel 7a.
- On your device, locate the APK file and install it. Make sure to enable app installation from unknown sources in the security settings if prompted.
Patch the init_boot.img File with Magisk:
Open Magisk app on your device, tap on install and tap again on “Select and Patch a file” and browse the init_boot.img file you’ve just copied. It will patch the file and save it in the same folder. Now you’ve to transfer patched-init_boot.img file to your PC to flash it using an adb command.
Launch Platform Tools and Open Command Prompt:
- Open the Platform Tools folder (extracted earlier) on your computer.
- Within the folder, press Shift + Right-click, then choose “Open command window here” or “Open PowerShell window here” from the context menu.
Boot Pixel 7a into Fastboot Mode:
- Power off your Pixel 7a completely.
- Press and hold the Volume Down button and the Power button simultaneously until the Fastboot Mode screen appears.
Flash the Patched init_boot.img:
In the command prompt or terminal window, type the following command and enter:
fastboot devices
Then type the following command and enter:
fastboot flash boot path/to/magisk_patched.imgReplace “path/to/magisk_patched.img” with the actual file path of the “magisk_patched.img” file you created earlier.
Wait for the flashing process to complete.
Reboot Your Phone:
- Once the flashing is complete, type the following command and press Enter:
fastboot reboot
Your Pixel 7a will now reboot.
Install Root Checker to Confirm Root Access:
- After your phone has restarted, go to the Google Play Store and install a root checker app (e.g., “Root Checker” by joeykrim).
- Open the root checker app and follow the on-screen instructions to confirm whether your Pixel 7a has been successfully rooted.
Conclusion
Congratulations! You have successfully rooted your Google Pixel 7a using Magisk. With root access, you can now enjoy a wide range of customization options and advanced features on your device. If you encounter any issues during the rooting process, feel free to ask for assistance in the comments section below. Don’t forget to share your experience and consider following our YouTube channel for more Android-related content.
Also read: How to root Pixel 7 or Pixel 7 pro


